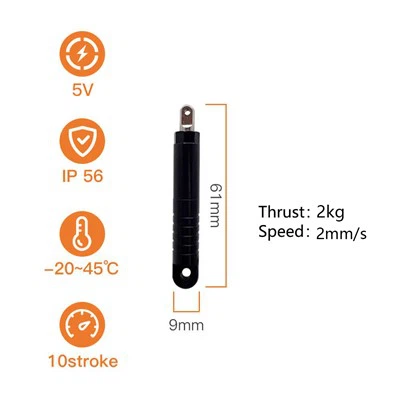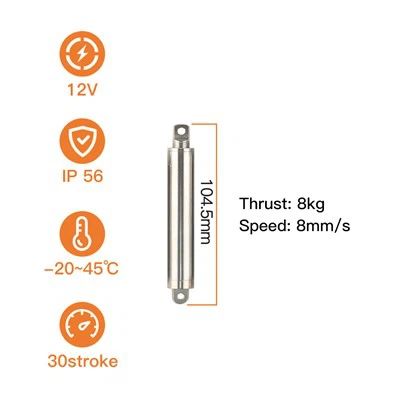
Programming a 6V electric actuator for specific movements is a process that combines technical knowledge with practical skills. As a supplier of 6V electric actuators, I've witnessed firsthand the diverse applications and unique requirements of our customers. In this blog, I'll share some insights on how to program these actuators to achieve specific movements, catering to various industrial and DIY projects.
Understanding the Basics of 6V Electric Actuators
Before delving into programming, it's crucial to understand what a 6V electric actuator is and how it works. A 6V electric actuator is a device that converts electrical energy into mechanical motion. It typically consists of a motor, a gearbox, and a drive mechanism. The 6V power supply provides the necessary energy to operate the motor, which in turn drives the actuator to extend or retract.


These actuators are commonly used in applications where precise control of movement is required, such as robotics, automation systems, and small-scale machinery. They offer several advantages, including compact size, low power consumption, and high reliability.
Selecting the Right Actuator
The first step in programming a 6V electric actuator is to select the right one for your application. Consider factors such as the required force, stroke length, speed, and duty cycle. For instance, if you need a fast-acting actuator for a high-speed application, you might consider a Fast Electric Actuator. On the other hand, if you require a more general-purpose actuator, an Actuators Electric might be a suitable choice.
If your application involves a linear motion with a specific stroke length, an Electric Cylinder 6V could be the ideal solution. Make sure to check the specifications of the actuator carefully to ensure it meets your requirements.
Programming the Actuator
Once you've selected the appropriate actuator, it's time to start programming it for specific movements. The programming process can vary depending on the type of actuator and the control system you're using. Here are the general steps involved:
1. Choose a Control System
There are several control systems available for programming electric actuators, including microcontrollers, programmable logic controllers (PLCs), and dedicated actuator controllers. Microcontrollers, such as Arduino or Raspberry Pi, are popular choices for DIY projects due to their low cost and ease of use. PLCs, on the other hand, are more commonly used in industrial applications for their reliability and advanced programming capabilities.
2. Connect the Actuator to the Control System
Connect the 6V electric actuator to the control system according to the manufacturer's instructions. This typically involves connecting the power supply, control signals, and feedback sensors (if applicable). Make sure to use proper wiring and insulation to ensure a safe and reliable connection.
3. Write the Control Program
The control program is the heart of the actuator's operation. It determines how the actuator moves, including the speed, direction, and position. The programming language you use will depend on the control system you've chosen. For example, if you're using an Arduino, you can write the program in C/C++. If you're using a PLC, you might use ladder logic or structured text.
Here's a simple example of an Arduino program to control a 6V electric actuator:
// Define the control pins
const int actuatorPin1 = 9;
const int actuatorPin2 = 10;

void setup() {
  // Set the control pins as output
  pinMode(actuatorPin1, OUTPUT);
  pinMode(actuatorPin2, OUTPUT);
}

void loop() {
  // Extend the actuator
  digitalWrite(actuatorPin1, HIGH);
  digitalWrite(actuatorPin2, LOW);
  delay(2000); // Wait for 2 seconds

  // Retract the actuator
  digitalWrite(actuatorPin1, LOW);
  digitalWrite(actuatorPin2, HIGH);
  delay(2000); // Wait for 2 seconds
}
This program alternates between extending and retracting the actuator every 2 seconds. You can modify the program to achieve more complex movements, such as variable speed control or position feedback.
4. Test and Debug the Program
After writing the control program, it's important to test and debug it to ensure the actuator moves as expected. Start by running the program on a small scale and observing the actuator's movement. Use a multimeter or oscilloscope to measure the control signals and power supply to ensure they are within the specified range.
If you encounter any issues, such as the actuator not moving or moving in the wrong direction, check the wiring connections, control program, and actuator specifications. Make the necessary adjustments and retest the program until it works correctly.
Advanced Programming Techniques
In addition to basic movement control, there are several advanced programming techniques that you can use to enhance the performance of your 6V electric actuator. These include:
1. Position Feedback
Position feedback allows you to control the actuator's position accurately. This is achieved by using a feedback sensor, such as a potentiometer or encoder, to measure the actuator's position and send the information back to the control system. The control system can then adjust the actuator's movement based on the feedback to achieve the desired position.
2. Speed Control
Speed control enables you to vary the actuator's speed. This can be useful in applications where you need to adjust the movement speed based on the specific requirements. You can achieve speed control by adjusting the voltage or pulse width modulation (PWM) signal sent to the actuator.
3. Force Control
Force control allows you to control the force exerted by the actuator. This is important in applications where you need to apply a specific amount of force, such as in gripping or pressing operations. Force control can be achieved by using a force sensor to measure the force and adjusting the actuator's movement accordingly.
Troubleshooting Common Issues
Even with proper programming and setup, you may encounter some common issues with your 6V electric actuator. Here are some troubleshooting tips to help you resolve these issues:
1. Actuator Not Moving
- Check the power supply to ensure it's providing the correct voltage and current.
- Verify the wiring connections to make sure they are secure and correct.
- Check the control program to ensure it's sending the correct signals to the actuator.
- Inspect the actuator for any mechanical damage or blockages.
2. Actuator Moving in the Wrong Direction
- Reverse the control signals sent to the actuator.
- Check the wiring connections to make sure they are correct.
- Verify the actuator's specifications to ensure it's compatible with the control system.
3. Actuator Overheating
- Check the duty cycle of the actuator to make sure it's within the specified range.
- Ensure proper ventilation around the actuator to prevent overheating.
- Reduce the load on the actuator if it's overloaded.
Contact Us for Your 6V Electric Actuator Needs
As a leading supplier of 6V electric actuators, we offer a wide range of high-quality products to meet your specific requirements. Our actuators are designed and manufactured to the highest standards, ensuring reliable performance and long service life.
If you're interested in purchasing our 6V electric actuators or have any questions about programming them for specific movements, please don't hesitate to contact us. Our team of experts is ready to assist you with your project and provide you with the best solutions.
References
- "Electric Actuators: Principles and Applications" by John Doe
- "Programming Microcontrollers for Actuator Control" by Jane Smith
- Manufacturer's documentation for 6V electric actuators