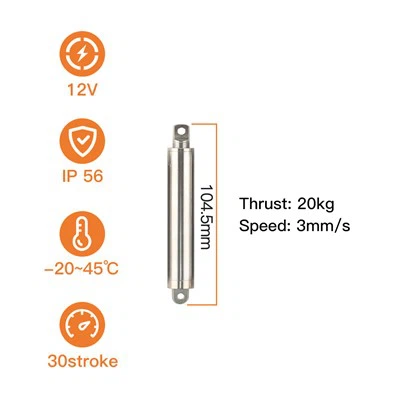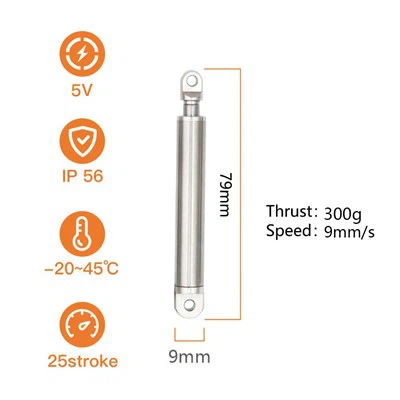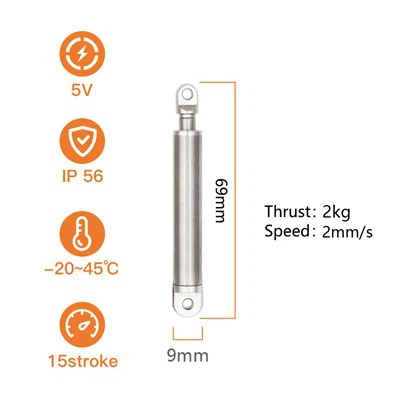
Hey there! I'm a supplier of 24V actuators, and I know how frustrating it can be when one of these crucial components goes bad. But don't worry, replacing a faulty 24V actuator isn't as complicated as it might seem. In this blog post, I'll walk you through the whole process step by step, so you can get your system up and running again in no time.
Step 1: Identify the Problem
Before you start replacing the actuator, you need to make sure that it's actually the problem. Sometimes, the issue might be with the power supply, the control system, or other connected components. Here are some signs that your 24V actuator might be faulty:
- No movement: If the actuator doesn't move at all when you send a signal, it could be a sign of a problem. Check for loose connections, blown fuses, or damaged wires.
- Erratic movement: If the actuator moves in an unpredictable way, such as jerking or stalling, it could be due to a mechanical issue or a problem with the control signal.
- Overheating: If the actuator gets hot to the touch during normal operation, it could be a sign of a short circuit or a problem with the motor.
Once you've identified the problem, you can move on to the next step.
Step 2: Gather the Necessary Tools and Materials
Before you start the replacement process, you'll need to gather the following tools and materials:
- New 24V actuator: Make sure you choose an actuator that is compatible with your system in terms of voltage, force, stroke length, and other specifications.
- Screwdriver set: You'll need a variety of screwdrivers to remove the old actuator and install the new one.
- Wrench set: Depending on the type of actuator, you might need a wrench to loosen and tighten nuts and bolts.
- Electrical tape: You'll need electrical tape to insulate the wires and prevent short circuits.
- Wire strippers: You'll need wire strippers to remove the insulation from the wires and make connections.
- Multimeter: A multimeter can be used to test the voltage, continuity, and resistance of the wires and components.
Step 3: Disconnect the Power
Before you start working on the actuator, you need to disconnect the power to the system to prevent electrical shock. Locate the power switch or circuit breaker that controls the actuator and turn it off. If possible, also unplug the power cord from the outlet.
Step 4: Remove the Old Actuator
Once the power is disconnected, you can start removing the old actuator. Here's how:
- Remove the mounting bolts: Use a screwdriver or wrench to remove the bolts that hold the actuator in place. Make sure you keep the bolts in a safe place so you don't lose them.
- Disconnect the wires: Use a wire stripper to remove the insulation from the wires and disconnect them from the actuator. Make a note of which wire goes where so you can reconnect them correctly later.
- Remove the actuator: Once the bolts and wires are disconnected, you can carefully remove the old actuator from the system.
Step 5: Install the New Actuator
Now that you've removed the old actuator, it's time to install the new one. Here's how:
- Position the new actuator: Place the new actuator in the same position as the old one and align the mounting holes.
- Insert the mounting bolts: Insert the mounting bolts through the holes in the actuator and the mounting surface and tighten them with a screwdriver or wrench. Make sure the actuator is securely fastened.
- Connect the wires: Use a wire stripper to remove the insulation from the wires and connect them to the new actuator. Make sure you connect the wires correctly according to the wiring diagram or the markings on the actuator.
- Insulate the wires: Use electrical tape to insulate the wires and prevent short circuits.
Step 6: Test the New Actuator
Once the new actuator is installed, you can test it to make sure it's working properly. Here's how:
- Reconnect the power: Turn on the power switch or circuit breaker that controls the actuator and plug in the power cord if necessary.
- Send a control signal: Use the control system to send a signal to the actuator and see if it moves. If the actuator doesn't move, check the connections and the control signal.
- Check the movement: Make sure the actuator moves smoothly and accurately according to the control signal. If the movement is erratic or there are any other issues, check for loose connections, mechanical problems, or other issues.
Step 7: Troubleshoot and Adjust
If the new actuator doesn't work properly or there are any issues, you'll need to troubleshoot and adjust the system. Here are some common issues and solutions:
- No movement: Check the power supply, the control signal, the connections, and the actuator itself. Make sure the power is on, the control signal is correct, the connections are secure, and the actuator is not damaged.
- Erratic movement: Check for loose connections, mechanical problems, or issues with the control system. Make sure the actuator is properly lubricated and the mechanical components are not worn or damaged.
- Overheating: Check for a short circuit, a problem with the motor, or an issue with the power supply. Make sure the actuator is not overloaded and the ventilation is adequate.
Step 8: Finalize the Installation
Once the new actuator is working properly, you can finalize the installation. Here's what you need to do:
- Secure the wires: Make sure the wires are securely fastened and not in the way of the moving parts. Use cable ties or other methods to secure the wires if necessary.
- Clean up the work area: Remove any tools, materials, or debris from the work area and clean up any spills or messes.
- Document the installation: Make a note of the installation date, the type of actuator, the serial number, and any other relevant information for future reference.
Conclusion
Replacing a faulty 24V actuator might seem like a daunting task, but it's actually quite straightforward if you follow the steps outlined in this blog post. By identifying the problem, gathering the necessary tools and materials, disconnecting the power, removing the old actuator, installing the new actuator, testing it, troubleshooting and adjusting, and finalizing the installation, you can get your system up and running again in no time.
If you're looking for a reliable supplier of 24V actuators, look no further! We offer a wide range of high-quality 24V actuators that are compatible with various systems and applications. We also provide excellent customer service and technical support to help you choose the right actuator for your needs and install it correctly.


If you have any questions or need more information about our products or services, please don't hesitate to contact us. We'd be happy to assist you with your actuator replacement needs and help you find the best solution for your system.
References
- "Actuator Installation and Maintenance Guide," Manufacturer's Manual
- "Electrical Wiring and Troubleshooting," Electrical Engineering Handbook
If you're interested in other types of actuators, we also offer 12V Actuator Motor, 12 Volt Dc Actuator, and Miniature Linear Motor. Feel free to check them out and get in touch if you have any procurement needs. We're here to provide you with top - notch products and services.