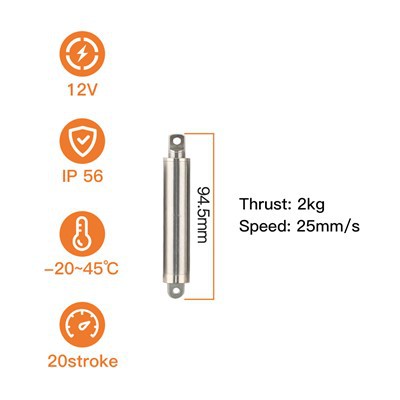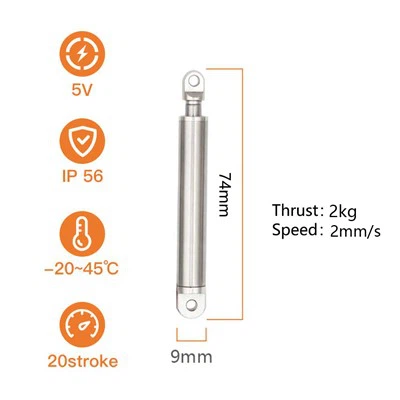
Installing a 12V linear actuator can seem like a daunting task, especially if you're new to the world of actuators. However, with the right guidance and a bit of patience, you can successfully install a 12V linear actuator in your project. As a trusted 12V Actuator Linear supplier, we're here to walk you through the installation process step by step.
Understanding the 12V Linear Actuator
Before we dive into the installation process, it's essential to understand what a 12V linear actuator is and how it works. A 12V linear actuator is a device that converts electrical energy into linear motion. It typically consists of a motor, a gearbox, and a lead screw or a rack and pinion mechanism. When powered by a 12V DC power source, the motor rotates, which in turn drives the gearbox and moves the actuator's rod in a linear direction.
These actuators are commonly used in a wide range of applications, including robotics, automation, automotive, and home improvement projects. They offer precise control over linear movement, making them ideal for tasks that require accurate positioning.
Tools and Materials You'll Need
Before you start the installation, gather the following tools and materials:
- 12V Linear Actuator: Make sure you have the right actuator for your project. You can explore our range of 12 Volt Linear Actuator with Remote and Micro Linear Actuator 12V options.
- Power Supply: A 12V DC power supply is required to operate the actuator. Ensure that the power supply can provide enough current to meet the actuator's requirements.
- Mounting Hardware: Depending on the actuator and your project, you may need bolts, nuts, washers, and brackets to mount the actuator securely.
- Wiring: You'll need appropriate wires to connect the actuator to the power supply. Make sure the wires are rated for the current and voltage of your system.
- Screwdriver Set: A set of screwdrivers will be useful for removing and installing screws during the installation process.
- Pliers: Pliers can be used to crimp connectors and manipulate wires.
- Multimeter: A multimeter is essential for testing the electrical connections and ensuring that the actuator is receiving the correct voltage.
Step-by-Step Installation Guide
Step 1: Plan the Installation
Before you start mounting the actuator, carefully plan its placement in your project. Consider the following factors:
- Movement Range: Determine the required stroke length (the distance the actuator's rod can extend and retract) and make sure there is enough space for the actuator to move freely.
- Mounting Orientation: Decide on the best orientation for mounting the actuator. This will depend on the application and the direction of the desired linear motion.
- Load Requirements: Consider the weight and size of the load that the actuator will be moving. Make sure the actuator is capable of handling the load.
Step 2: Mount the Actuator
Once you have planned the installation, it's time to mount the actuator. Follow these steps:
- Position the Actuator: Place the actuator in the desired location and align it with the mounting holes or brackets.
- Secure the Actuator: Use the appropriate mounting hardware (bolts, nuts, and washers) to secure the actuator in place. Make sure the actuator is firmly attached and does not move or vibrate during operation.
Step 3: Connect the Wiring
After mounting the actuator, it's time to connect the wiring. Follow these steps:
- Identify the Wires: The actuator will typically have two wires for power connection (positive and negative). Refer to the actuator's documentation to identify the correct wires.
- Prepare the Wires: Strip the ends of the wires to expose the bare copper. Use pliers to crimp connectors onto the wires if necessary.
- Connect to the Power Supply: Connect the positive wire of the actuator to the positive terminal of the 12V DC power supply, and the negative wire to the negative terminal. Make sure the connections are secure and there are no loose wires.
- Test the Connections: Use a multimeter to test the voltage across the actuator's terminals. Make sure the voltage is within the acceptable range (usually around 12V).
Step 4: Test the Actuator
Once the wiring is connected, it's time to test the actuator. Follow these steps:


- Power On the System: Turn on the 12V DC power supply and observe the actuator. The actuator's rod should start to move in one direction.
- Reverse the Polarity: If the actuator does not move in the desired direction, reverse the polarity of the power connections (swap the positive and negative wires). This will reverse the direction of the actuator's movement.
- Test the Full Stroke: Move the actuator's rod through its full stroke (extend and retract) to ensure that it operates smoothly and without any issues.
Step 5: Fine-Tune the Installation
After testing the actuator, you may need to fine-tune the installation to ensure optimal performance. Consider the following:
- Adjust the Mounting: If the actuator is not moving smoothly or is making noise, check the mounting to make sure it is secure and properly aligned.
- Check the Wiring: Inspect the wiring connections to ensure they are tight and there are no loose wires.
- Lubricate the Actuator: If the actuator has moving parts, such as a lead screw or a rack and pinion mechanism, lubricate them according to the manufacturer's recommendations.
Troubleshooting Tips
If you encounter any issues during the installation or operation of the 12V linear actuator, here are some troubleshooting tips:
- Actuator Does Not Move: Check the power supply to make sure it is providing the correct voltage. Also, check the wiring connections to ensure they are secure and there are no loose wires.
- Actuator Moves Slowly or Jerks: This could be due to a low power supply or a mechanical issue. Check the power supply voltage and make sure it is within the acceptable range. Also, inspect the actuator for any signs of damage or obstruction.
- Actuator Overheats: Overheating can be caused by a high load or a faulty motor. Make sure the actuator is not overloaded and the motor is operating correctly. If the problem persists, contact the manufacturer for further assistance.
Conclusion
Installing a 12V linear actuator is a relatively straightforward process if you follow the right steps and use the appropriate tools and materials. As a leading 12V Actuator Linear supplier, we're committed to providing high-quality products and excellent customer support. If you have any questions or need further assistance with your actuator installation, please don't hesitate to contact us. We're here to help you make your project a success.
In addition to our 12V linear actuators, we also offer a range of Actuator 24V options for applications that require higher voltage. Whether you're working on a small DIY project or a large industrial application, we have the right actuator for your needs.
If you're interested in purchasing our 12V linear actuators or have any questions about our products, please contact us for more information. We look forward to working with you and helping you find the perfect actuator solution for your project.
References
- Manufacturer's documentation for the 12V linear actuator
- Electrical engineering textbooks for basic wiring and power supply concepts
- Online resources and forums for additional installation tips and troubleshooting advice